#### UCczXrZ5r1nCMACiaipGqbtw
#### SELECT * FROM DAvidKanal WHERE `Chan` ="UCczXrZ5r1nCMACiaipGqbtw"
BASE
:::::::: SELECT * FROM DAvidKanal WHERE Chan="UCczXrZ5r1nCMACiaipGqbtw"
#~~~~# SELECT * FROM DAvidKanal WHERE Chan="UCczXrZ5r1nCMACiaipGqbtw"
#~~~~# http://chegu.de/Ausgabe.php?URL=https://www.youtube.com/feeds/videos.xml?channel_id=UCczXrZ5r1nCMACiaipGqbtw
**36901
**?xml version="1.0" encoding="UTF-8"?>
feed xmlns:yt="http://www.youtube.com/xml/schemas/2015" xmlns:media="http://search.yahoo.com/mrss/" xmlns="http://www.w3.org/2005/Atom">
link rel="self" href="http://www.youtube.com/feeds/videos.xml?channel_id=UCczXrZ5r1nCMACiaipGqbtw"/>
id>yt:channel:czXrZ5r1nCMACiaipGqbtw/id>
yt:channelId>czXrZ5r1nCMACiaipGqbtw/yt:channelId>
title>Van Tech Corner/title>
link rel="alternate" href="https://www.youtube.com/channel/UCczXrZ5r1nCMACiaipGqbtw"/>
author>
name>Van Tech Corner/name>
uri>https://www.youtube.com/channel/UCczXrZ5r1nCMACiaipGqbtw/uri>
/author>
published>2011-03-28T02:37:58+00:00/published>
entry>
id>yt:video:4jnXDqyA6t8/id>
yt:videoId>4jnXDqyA6t8/yt:videoId>
yt:channelId>UCczXrZ5r1nCMACiaipGqbtw/yt:channelId>
title>youyeetoo X1 SBC - Unboxing, Quick Overview and Booting up/title>
link rel="alternate" href="https://www.youtube.com/watch?v=4jnXDqyA6t8"/>
author>
name>Van Tech Corner/name>
uri>https://www.youtube.com/channel/UCczXrZ5r1nCMACiaipGqbtw/uri>
/author>
published>2024-04-17T11:30:02+00:00/published>
updated>2024-04-22T00:02:01+00:00/updated>
media:group>
media:title>youyeetoo X1 SBC - Unboxing, Quick Overview and Booting up/media:title>
media:content url="https://www.youtube.com/v/4jnXDqyA6t8?version=3" type="application/x-shockwave-flash" width="640" height="390"/>
media:thumbnail url="https://i1.ytimg.com/vi/4jnXDqyA6t8/hqdefault.jpg" width="480" height="360"/>
media:description>youyeetoo X1 is an x86 Single Board Computer (SBC) which is powered by the Intel® Celeron 11'th Gen Jasper Lake N5105. It comes with soldered RAM and eMMC. You can select from 4GB, 8GB or 16GB of RAM to pair with No-eMMC, 64GB, 128GB and 256GB of eMMC. Besides typical Gigabit Ethernet port, M.2 port for NVMe/SATA SSD, the X1 SBC also allows you to access GPIO, SPI, I2C and UART, etc. You can also connect an external screen via MIPI, HDMI and micro-HDMI port.
With low power-consumption x86 CPU (TDP 10W), the youyeetoo X1 SBC is suitable for general-purpose applications since it can run both Windows and Linux. It is also a good choice for lightweight virtualization with Proxmox or VmWare EXSI.
You can find the X1 SBC here: https://www.youyeetoo.com/products/youyeetoo-x1-x86-single-board-computer?VariantsId=11287
Video timeframe:
00:00 - Unboxing the yooyeetoo X1 SBC
02:13 - Unboxing the metal casing for X1 SBC
03:01 - Unboxing the 7 Inch MIPI Display (with touch screen)
04:55 - Closer look at the yooyeetoo X1 I/O and connectors
07:31 - Power on the youyeetoo X1 SBC (Windows 11 pre-installed)
13:32 - Connect Ethernet cable, and a lot of Windows Updates
15:06 - Speedtest with Microsoft Edge
17:09 - Testing with WebGL Aquarium
18:38 - Video playback on Youtube
19:43 - What is next?
That is all for this video. Thanks for watching and see you all in the next one!/media:description>
media:community>
media:starRating count="39" average="5.00" min="1" max="5"/>
media:statistics views="1646"/>
/media:community>
/media:group>
/entry>
entry>
id>yt:video:PQiV9ovIWsY/id>
yt:videoId>PQiV9ovIWsY/yt:videoId>
yt:channelId>UCczXrZ5r1nCMACiaipGqbtw/yt:channelId>
title>GL-iNet Flint 2 - Peformance Test: WAN to LAN, WiFi, VPN Throughput/title>
link rel="alternate" href="https://www.youtube.com/watch?v=PQiV9ovIWsY"/>
author>
name>Van Tech Corner/name>
uri>https://www.youtube.com/channel/UCczXrZ5r1nCMACiaipGqbtw/uri>
/author>
published>2024-03-19T11:15:02+00:00/published>
updated>2024-04-16T06:34:19+00:00/updated>
media:group>
media:title>GL-iNet Flint 2 - Peformance Test: WAN to LAN, WiFi, VPN Throughput/media:title>
media:content url="https://www.youtube.com/v/PQiV9ovIWsY?version=3" type="application/x-shockwave-flash" width="640" height="390"/>
media:thumbnail url="https://i1.ytimg.com/vi/PQiV9ovIWsY/hqdefault.jpg" width="480" height="360"/>
media:description>In the previous video, we already took a look at the GL-iNet Flint 2 (GL-MT6000). In this video, let's check out the device's performance by running the below tests:
- WAN to LAN throughput test with OpenSpeedTest and iPerf3
- Hardware Acceleration ON vs OFF
- Wireless (WiFi) Throughput in 5GHz channel
- OpenVPN Throughput
- Wireguard Throughput
Check out the Flint router: https://link.gl-inet.com/VanTechCorner
Buy it: https://link.gl-inet.com/storeVanTechCorner
Amazon ordering link:https://link.gl-inet.com/AmazonVanTechCorner
Video timeline:
00:00 - Intro
00:26 - Testing Diagram
01:15 - WAN to LAN Throughput Test (HW Acceleration ON)
04:29 - WAN to LAN Throughput Test (HW Acceleration OFF)
07:31 - Wireless (WiFi) Throughput
10:16 - OpenVPN Throughput Test
11:59 - Wireguard Throughput Test
That is all for this video. Thanks for watching and see you in the next video!/media:description>
media:community>
media:starRating count="63" average="5.00" min="1" max="5"/>
media:statistics views="2509"/>
/media:community>
/media:group>
/entry>
entry>
id>yt:video:VBTFtVeu358/id>
yt:videoId>VBTFtVeu358/yt:videoId>
yt:channelId>UCczXrZ5r1nCMACiaipGqbtw/yt:channelId>
title>GL-iNet Flint 2 - WiFi 6 AX6000, 2.5GbE Router - Overview, Setup and Speed Test/title>
link rel="alternate" href="https://www.youtube.com/watch?v=VBTFtVeu358"/>
author>
name>Van Tech Corner/name>
uri>https://www.youtube.com/channel/UCczXrZ5r1nCMACiaipGqbtw/uri>
/author>
published>2024-03-10T15:13:07+00:00/published>
updated>2024-04-16T05:25:51+00:00/updated>
media:group>
media:title>GL-iNet Flint 2 - WiFi 6 AX6000, 2.5GbE Router - Overview, Setup and Speed Test/media:title>
media:content url="https://www.youtube.com/v/VBTFtVeu358?version=3" type="application/x-shockwave-flash" width="640" height="390"/>
media:thumbnail url="https://i3.ytimg.com/vi/VBTFtVeu358/hqdefault.jpg" width="480" height="360"/>
media:description>Flint 2 (GL-MT6000) is a high performance WiFi 6 router from GL-iNet. Powered by the MediaTek Filogic 830 (MT7986), the Flint 2 integrated a 4 cores, 64-bit CPU clocked at 2.0GHz. It is also comes with 1GB of DDR4 RAM and 8GB of eMMC storage
For I/O, the Flint 2 has 2 x 2.5 Gigabit Ethernet port, 4 x Gigabit Ethernet port, 6000 Mbps WiFi througput in total (AX6000) and a USB 3.0 port. The device supports dual-wan/multi-wan setup with Ethernet, Cellular & WiFi.
The device is running a customized version of OpenWrt 23.05. Right now, there is no information of official OpenWrt support, but I hope there will be good news soon.
Check out the Flint router: https://link.gl-inet.com/VanTechCorner
Buy it: https://link.gl-inet.com/storeVanTechCorner
Amazon ordering link:https://link.gl-inet.com/AmazonVanTechCorner
Video timeframe:
00:00 - Flint 2 (GL-MT6000) Intro & Specs Highlight
01:49 - Flint 2 - Features
02:44 - Ways to manage the Flint 2
03:09 - Unboxing the Flint 2 - What is inside the box?
03:49 - First time Setup (Internet)
05:35 - Acess Web Interface & Upgrade Firmware
07:27 - GL-iNet Web Interface Walk Through
12:36 - Enable IPv6 for Internet (WAN)
13:48 - PPPoE Throughput (Wired) - Hardware Acceleration Enabled
15:25 - PPPoE Throughput (Wired) - Hardware Acceleration Disabled
17:40 - PPPoE Throughput (WiFi) - Connection Overview
18:06 - PPPoE Throughput (WiFi) - Speedtest
19:19 - What is next?
In the next video, we will have further testing, such as WAN to LAN throughput test (both WAN and LAN 2.5GbE), OpenVPN and Wireguard VPN. We will also check out the NAS throughput with a USB 3.0 disk, and more.
Thanks for watching and see you in the next video!/media:description>
media:community>
media:starRating count="121" average="5.00" min="1" max="5"/>
media:statistics views="4201"/>
/media:community>
/media:group>
/entry>
entry>
id>yt:video:Pe6Qo6p-8sI/id>
yt:videoId>Pe6Qo6p-8sI/yt:videoId>
yt:channelId>UCczXrZ5r1nCMACiaipGqbtw/yt:channelId>
title>Raspberry Pi 5 - Official OpenWrt Support Firmware Throughput Test/title>
link rel="alternate" href="https://www.youtube.com/watch?v=Pe6Qo6p-8sI"/>
author>
name>Van Tech Corner/name>
uri>https://www.youtube.com/channel/UCczXrZ5r1nCMACiaipGqbtw/uri>
/author>
published>2024-02-24T11:30:19+00:00/published>
updated>2024-04-16T02:50:17+00:00/updated>
media:group>
media:title>Raspberry Pi 5 - Official OpenWrt Support Firmware Throughput Test/media:title>
media:content url="https://www.youtube.com/v/Pe6Qo6p-8sI?version=3" type="application/x-shockwave-flash" width="640" height="390"/>
media:thumbnail url="https://i1.ytimg.com/vi/Pe6Qo6p-8sI/hqdefault.jpg" width="480" height="360"/>
media:description>Finanlly, the Raspberry Pi 5 received official OpenWrt support. In this video, I will run a simple WAN to LAN throughput test with OpenSpeedTest and iperf3.
Since the Raspberry Pi 5 only has 1 network port, I used a USB 3.0 to Ethernet adapter as the WAN interface.
For this test, I used 2 USB to Ethernet adapter:
- D-Link DUB-1213 USB 3.0 to Gigabit Ethernet Adapter (ASIX AX88179)
- No-Brand USB 3.0 to 2.5 Gigabit Ethernet Adapter (Realtek RTL8156B)
Check out the video for more information.
You can find the products in the below URL (affilate)
Raspberry Pi 5 - https://my.cytron.io/p-raspberry-pi-5?tracking=vantech
Build the firmware: https://firmware-selector.openwrt.org/
Driver packages:
https://openwrt.org/packages/pkgdata/kmod-usb-net-asix-ax88179
https://openwrt.org/packages/pkgdata/kmod-usb-net-rtl8152
Video timeframe:
00:00 - Intro
00:29 - USB 3.0 to Ethernet Adapters for the Raspberry Pi 5
01:21 - Build OpenWrt firmware for Pi 5 with LuCI & drivers
02:37 - Enable Software Offloading & Packet Steering
03:08 - Throughput Test - D-Link DUB-1312
03:34 - Throughput Test - No-Brand 2.5GbE Adapter
Thanks for watching and see you in the next video!/media:description>
media:community>
media:starRating count="108" average="5.00" min="1" max="5"/>
media:statistics views="3453"/>
/media:community>
/media:group>
/entry>
entry>
id>yt:video:X_2Te6XTkU8/id>
yt:videoId>X_2Te6XTkU8/yt:videoId>
yt:channelId>UCczXrZ5r1nCMACiaipGqbtw/yt:channelId>
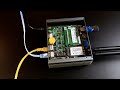
title>Raspberry Pi 5 - OpenWrt Install & Performance Test/title>
link rel="alternate" href="https://www.youtube.com/watch?v=X_2Te6XTkU8"/>
author>
name>Van Tech Corner/name>
uri>https://www.youtube.com/channel/UCczXrZ5r1nCMACiaipGqbtw/uri>
/author>
published>2024-01-21T11:30:20+00:00/published>
updated>2024-04-15T22:44:41+00:00/updated>
media:group>
media:title>Raspberry Pi 5 - OpenWrt Install & Performance Test/media:title>
media:content url="https://www.youtube.com/v/X_2Te6XTkU8?version=3" type="application/x-shockwave-flash" width="640" height="390"/>
media:thumbnail url="https://i1.ytimg.com/vi/X_2Te6XTkU8/hqdefault.jpg" width="480" height="360"/>
media:description>In this video, I am going to install OpenWrt on the Raspberry Pi 5. After that, let's have some performance tests, including WAN to LAN throughput with OpenSpeedTest and iPerf3, OpenVPN and Wireguard VPN throughput.
Since the Raspberry Pi 5 only has 1 x Ethernet port, I used the D-Link DUB-1312 USB to Ethernet adapter as the WAN port. The onboard Ethernet port was configured as LAN.
OpenWrt for Raspberry Pi 5 - https://github.com/mj22226/openwrt/releases/tag/bcm2712-6.1
PR to add support for RPI 5 - https://github.com/openwrt/openwrt/pull/13987
You can find the products in the below URL (affilate)
Raspberry Pi 5 - https://my.cytron.io/p-raspberry-pi-5?tracking=vantech
D-Link DUB-1312 - https://amzn.to/3U8A8oy
00:00 - Intro
00:34 - Download & Burn OpenWrt to microSD card
00:55 - Hardware Setup
01:56 - Power on the Raspberry Pi 5 with OpenWrt
02:17 - Access the LuCI Web Interface
03:06 - WAN to LAN Throughput Test
04:30 - OpenVPN Throughput Test
06:31 - Wireguard VPN Throughput Test
07:56 - Conclusion
Thanks for watching and see you in the next video!/media:description>
media:community>
media:starRating count="140" average="5.00" min="1" max="5"/>
media:statistics views="7228"/>
/media:community>
/media:group>
/entry>
entry>
id>yt:video:UT0jj1DXwyk/id>
yt:videoId>UT0jj1DXwyk/yt:videoId>
yt:channelId>UCczXrZ5r1nCMACiaipGqbtw/yt:channelId>
title>FriendlyElec NanoPC-T6 Overview & Quick Test/title>
link rel="alternate" href="https://www.youtube.com/watch?v=UT0jj1DXwyk"/>
author>
name>Van Tech Corner/name>
uri>https://www.youtube.com/channel/UCczXrZ5r1nCMACiaipGqbtw/uri>
/author>
published>2023-11-28T16:00:19+00:00/published>
updated>2024-04-10T15:16:42+00:00/updated>
media:group>
media:title>FriendlyElec NanoPC-T6 Overview & Quick Test/media:title>
media:content url="https://www.youtube.com/v/UT0jj1DXwyk?version=3" type="application/x-shockwave-flash" width="640" height="390"/>
media:thumbnail url="https://i2.ytimg.com/vi/UT0jj1DXwyk/hqdefault.jpg" width="480" height="360"/>
media:description>This video will show you the overview of the NanoPC-T6 - a high performance edge computing Single Board Computer from FriendlyElec.
The NanoPC-T6 was built on the Rockchip RK3588 SoC. It comes with an 8-cores CPU: 4 x ARM Cortex-A76 cores & 4 x ARM Cortex-A55 cores, 6TOPS NPU, the Mali-G610 MP4 GPU and the intergrated VPU supports upto 8K video econding & decoding.
For connectity, the NanoPC-T6 comes with 2 x 2.5GbE ports, an M.2 M-Key connector for NVMe SSD, an M.2 E-Key connector for WiFi & Bluetooth module, and a Mini-PCIe connector for 4G/5G module. This makes the NanoPC-T6 suitable for different applications and usages.
You can purchase the NanoPC-T6 from the WayPonDev store on Amazon:
https://amzn.to/3sXowcD
NanoPC-T6 4+32GB: https://www.amazon.com/dp/B0C4YPCR96?ref=myiVan Tech Corner :: YouTUBE Kanaldp
NanoPC-T6 8+64GB: https://www.amazon.com/dp/B0C4YPVQ8Q?ref=myiVan Tech Corner :: YouTUBE Kanaldp
NanoPC-T6 16+128GB: https://www.amazon.com/dp/B0C4YQT8XY?ref=myiVan Tech Corner :: YouTUBE Kanaldp
With M.2 Wifi Module Bundle
NanoPC-T6 4+32GB: https://www.amazon.com/dp/B0C4TN1SKH?ref=myiVan Tech Corner :: YouTUBE Kanaldp
NanoPC-T6 8+64GB: https://www.amazon.com/dp/B0C4TQXRTS?ref=myiVan Tech Corner :: YouTUBE Kanaldp
NanoPC-T6 16+128GB: https://www.amazon.com/dp/B0C4TQ8BG4?ref=myiVan Tech Corner :: YouTUBE Kanaldp
Video timeframe:
00:00 - NanoPC-T6 Highlight
00:42 - Version & Pricing
01:06 - NanoPC-T6's IO
02:09 - Closer look at the PCB components
05:21 - Hardware Setup
05:44 - NanoPC-T6 First Boot (Ubuntu)
05:56 - Wireless Connectivity Test (WiFi & LTE)
06:48 - Ethernet Connectivity Test
07:05 - eMMC Speed Test (hdparm)
07:20 - Video Playback & GPU Performance
08:32 - Next Video Preview
Thanks for watching and see you in the next one!/media:description>
media:community>
media:starRating count="109" average="5.00" min="1" max="5"/>
media:statistics views="3766"/>
/media:community>
/media:group>
/entry>
entry>
id>yt:video:ufzR8e4mubg/id>
yt:videoId>ufzR8e4mubg/yt:videoId>
yt:channelId>UCczXrZ5r1nCMACiaipGqbtw/yt:channelId>
title>Replace ISP ONT/ONU - HSGQ SFP XPON ONU Stick/title>
link rel="alternate" href="https://www.youtube.com/watch?v=ufzR8e4mubg"/>
author>
name>Van Tech Corner/name>
uri>https://www.youtube.com/channel/UCczXrZ5r1nCMACiaipGqbtw/uri>
/author>
published>2023-10-29T11:30:30+00:00/published>
updated>2024-03-05T13:49:42+00:00/updated>
media:group>
media:title>Replace ISP ONT/ONU - HSGQ SFP XPON ONU Stick/media:title>
media:content url="https://www.youtube.com/v/ufzR8e4mubg?version=3" type="application/x-shockwave-flash" width="640" height="390"/>
media:thumbnail url="https://i2.ytimg.com/vi/ufzR8e4mubg/hqdefault.jpg" width="480" height="360"/>
media:description>In this video, we will take a look at the the XPON ONU Stick from HSGQ. The video will walk you through the Web Interface of the XPON ONU Stick and the process of replacing the ISP provided ONT/ONU with this SFP XPON module. (XPON means the SFP supports both GPON and EPON)
In this setup, the HSGQ is connected to the 2.5G Media Converter. The RJ45 port of the Media Converter is connected to the WAN port of the Nano Pi R6S.
If this is your first attempt replacing the ISP provided device, you can check out the below videos for more information:
What is OLT & ONT/ONU - Hisense GPON LTE3415 https://youtu.be/yD8aq4KSWko?si=HPIykg9wbIwhWMe1
LEOX LXT-010S-H SFP GPON Module https://youtu.be/G3va7X4PZFo?si=zqYoP1OJfMvWymPP
NOKIA GPON SFP G-010S-A https://youtu.be/3g6mRDfUppQ?si=51u7USKel5ZUWn1q
Ubiquiti UFiber LOCO https://youtu.be/ZI2U8wnJ4IQ?si=MJJtPJK4uJFV7TV3
Besides the Web Interface, you can also configure the SFP module via Telnet. The commands are the same with other Realtek GPON SFP, such as the ODI DFP-34G-2C2 and the LEOX LXT-010S-H.
Video timeframe:
00:00 - Intro
00:29 - A short history of ODI/HSGQ SFP PON Stick
01:06 - Overview of the HSGQ SFP XPON ONU Stick
01:54 - Getting Started - Connecting the Hardware
02:21 - Access the HSGQ SFP XPON Web Interface
04:04 - The PON Tab - XPON (GPON/EPON status)
04:46 - The PON Settings (where you configure most of the thing)
06:18 - MAC & MACKEY (must see)
07:13 - VLAN Setting (Auto/Manual Transparent or PVID)
07:53 - Clone the OMCI value from the ISP provided ONT
09:02 - Check the PON Authenticate Status (O5 = good to go)
09:28 - Set up PPPoE on the NanoPi R6S
12:08 - Some Speedtests
13:53 - More about the VLAN tagging on the XPON SFP Module
Special thanks to Äông VÅ© for lending me the HSGQ XPON SFP module.
Thank you for watching and see you in the next video!/media:description>
media:community>
media:starRating count="232" average="5.00" min="1" max="5"/>
media:statistics views="14115"/>
/media:community>
/media:group>
/entry>
entry>
id>yt:video:xwkmQ7JYWek/id>
yt:videoId>xwkmQ7JYWek/yt:videoId>
yt:channelId>UCczXrZ5r1nCMACiaipGqbtw/yt:channelId>
title>Install OpenWrt 23 on Banana Pi R2 PRO & PPPoE Speedtest/title>
link rel="alternate" href="https://www.youtube.com/watch?v=xwkmQ7JYWek"/>
author>
name>Van Tech Corner/name>
uri>https://www.youtube.com/channel/UCczXrZ5r1nCMACiaipGqbtw/uri>
/author>
published>2023-09-30T15:00:57+00:00/published>
updated>2024-02-29T23:21:07+00:00/updated>
media:group>
media:title>Install OpenWrt 23 on Banana Pi R2 PRO & PPPoE Speedtest/media:title>
media:content url="https://www.youtube.com/v/xwkmQ7JYWek?version=3" type="application/x-shockwave-flash" width="640" height="390"/>
media:thumbnail url="https://i1.ytimg.com/vi/xwkmQ7JYWek/hqdefault.jpg" width="480" height="360"/>
media:description>In this video, I will show you how to install the latest OpenWrt version on the Banana Pi R2 PRO internal eMMC. (OpenWrt 23.02 snapshot). After that, let's check out the PPPoE throughput with VLAN (packet steering on).
OpenWrt 21.02 firmware provided by Banana Pi is out of date and there are problems with DSA, for example VLAN is not working fine. Fortunately, mj22226 and other developers are maintaining an up-to-date OpenWrt version which can be used for the BPI-R2-PRO and other SBC with Rockchip SoC, such as the NanoPi R4S, Rock Pi 4, etc. In this video, I will use OpenWrt from him.
You can check out the guide at: https://vantc.net/install-openwrt-23-snapshot-firmware-on-banana-pi-bpi-r2-pro.html
Video timeframe:
00:00 - Intro
00:35 - OpenWrt firmware from mj2226 (Marty Jones)
01:21 - Create microSD card to boot OpenWrt
01:35 - Boot OpenWrt on microSD card with MASKROOM button
02:04 - Flash OpenWrt to the internal eMMC storage
02:34 - Boot OpenWrt from internal eMMC storage
02:52 - Install the latest OpenWrt firmware for the BPI-R2-PRO
03:29 - Test Overview
03:49 - PPPoE with VLAN - Speedtest - SW Offloading Enabled
04:17 - PPPoE with VLAN - Speedtest - SW Offloading Disabled
BPI R2 PRO Wiki - https://wiki.banana-pi.org/Getting_Started_with_R2PRO#introduction
Thanks for watching and see you again!/media:description>
media:community>
media:starRating count="97" average="5.00" min="1" max="5"/>
media:statistics views="4886"/>
/media:community>
/media:group>
/entry>
entry>
id>yt:video:CSs0Em3IFm8/id>
yt:videoId>CSs0Em3IFm8/yt:videoId>
yt:channelId>UCczXrZ5r1nCMACiaipGqbtw/yt:channelId>
title>Linksys WRT1900AC V1 (throughput) is broken after DSA migration (OpenWrt 21/22/23)/title>
link rel="alternate" href="https://www.youtube.com/watch?v=CSs0Em3IFm8"/>
author>
name>Van Tech Corner/name>
uri>https://www.youtube.com/channel/UCczXrZ5r1nCMACiaipGqbtw/uri>
/author>
published>2023-09-10T13:15:00+00:00/published>
updated>2024-03-03T21:50:50+00:00/updated>
media:group>
media:title>Linksys WRT1900AC V1 (throughput) is broken after DSA migration (OpenWrt 21/22/23)/media:title>
media:content url="https://www.youtube.com/v/CSs0Em3IFm8?version=3" type="application/x-shockwave-flash" width="640" height="390"/>
media:thumbnail url="https://i4.ytimg.com/vi/CSs0Em3IFm8/hqdefault.jpg" width="480" height="360"/>
media:description>The Linksys WRT1900AC's throughput is very poor after upgraded to OpenWrt 21, 22 and 23 where DSA replaced swconfig.
With OpenWrt 19, the Linksys WRT1900AC V1 can handle Gigabit (940Mbps) WAN to LAN throughput. However, it only does 350/800 Mbps with OpenWrt 21/22/23 (PPPoE). WAN to LAN throughput better for DHCP (780/660 Mbps), but still far away from the expected throughput.
For now, the only solution I have to improve the performance is downgrading the WRT1900AC to OpenWrt 19 where swconfig is being used. If you have any idea how to get a better throughput/performance with OpenWrt 21/22/23, please share in the comment section.
WRT1900 return to stock firmware - https://openwrt.org/toh/linksys/wrt1900ac#return_to_stock_firmware
Video timeframe:
00:00 - Intro & Story
01:15 - WRT1900AC V1 Throughput with OpenWrt 22 (DSA)
02:32 - Failed to Downgrade from OpenWrt 22 to OpenWrt 19 using LuCI
03:16 - Revert / Return Linksys WRT1900AC V1 to stock firmware
03:51 - Install OpenWrt 19 from Linksys Stock Firmware
04:20 - Configure PPPoE with VLAN tagging
04:54 - PPPoE throughput - SW Offloading Disabled
05:12 - PPPoE throughput - SW Offloading Enabled
05:46 - Configure PPPoE with no VLAN tagging & throughput
06:23 - Final words
That is all. Thanks for watching and see you in the next video!/media:description>
media:community>
media:starRating count="69" average="5.00" min="1" max="5"/>
media:statistics views="2857"/>
/media:community>
/media:group>
/entry>
entry>
id>yt:video:LwCyzIiexfs/id>
yt:videoId>LwCyzIiexfs/yt:videoId>
yt:channelId>UCczXrZ5r1nCMACiaipGqbtw/yt:channelId>
title>OpenWrt 22.03 - File Sharing with Samba4 - NVMe NAS test with NanoPi R6C/title>
link rel="alternate" href="https://www.youtube.com/watch?v=LwCyzIiexfs"/>
author>
name>Van Tech Corner/name>
uri>https://www.youtube.com/channel/UCczXrZ5r1nCMACiaipGqbtw/uri>
/author>
published>2023-08-27T11:15:01+00:00/published>
updated>2024-03-01T10:36:13+00:00/updated>
media:group>
media:title>OpenWrt 22.03 - File Sharing with Samba4 - NVMe NAS test with NanoPi R6C/media:title>
media:content url="https://www.youtube.com/v/LwCyzIiexfs?version=3" type="application/x-shockwave-flash" width="640" height="390"/>
media:thumbnail url="https://i1.ytimg.com/vi/LwCyzIiexfs/hqdefault.jpg" width="480" height="360"/>
media:description>In this video, I will show you how to install Samba4 on OpenWrt. For the test, I used the NanoPi R6C, the Intel Optane NVMe SSD (16GB) and a 5V/3A power supply. At the end, we will run a simple disk benchmark test with CrystalDiskMark. At the same time, let's check out the NanoPi R6C's power consumption when the test is running.
The video will walk you through:
+ Configure Storage (USB/SSD/HDD/NVMe)
+ Create Disk partition & File system
+ Mount the partition on OpenWrt/Linux
+ Install & Configure Samba4
Link to the command/doc: https://vantc.net/setup-file-sharing-smb-on-openwrt-with-samba4.html
Video timeframe:
00:00 - Intro
00:26 - Video content
00:53 - Why I make this video?
01:49 - To get started, you will need
02:24 - Establish SSH connection to the router
02:56 - Configure Storage on OpenWrt
03:54 - Check if Storage device (USB/SSD/HDD) is detected
04:54 - Create a partition on the disk
06:44 - Create a file system (ext4)
08:06 - Mount the partition with LuCI
09:35 - Check if the mount is working
10:25 - Install & Configure Samba4
12:13 - Create SMB (Samba) User & Password
14:11 - Map the Network Drive on Windows
14:45 - Can't write to the Network Drive - Troubleshoot
15:34 - File transferring speedtest
17:14 - Disk Benchmark & Power Consumption
18:29 - Advanced configuration
18:50 - Note for Windows users
You can find the NanoPi R6C on Amazon (affiliate)
R6C 4GB RAM - no eMMC: https://amzn.to/45pF4Il
R6C 8GB RAM - 32GB eMMC: https://amzn.to/3QWiaDT
Thanks for watching and see you guys in the next video!/media:description>
media:community>
media:starRating count="117" average="5.00" min="1" max="5"/>
media:statistics views="4482"/>
/media:community>
/media:group>
/entry>
entry>
id>yt:video:DWIhIUDWX0Q/id>
yt:videoId>DWIhIUDWX0Q/yt:videoId>
yt:channelId>UCczXrZ5r1nCMACiaipGqbtw/yt:channelId>
title>Setup Zyxel NWA50AX Access Point with Nebula Mobile App/title>
link rel="alternate" href="https://www.youtube.com/watch?v=DWIhIUDWX0Q"/>
author>
name>Van Tech Corner/name>
uri>https://www.youtube.com/channel/UCczXrZ5r1nCMACiaipGqbtw/uri>
/author>
published>2023-08-13T13:00:15+00:00/published>
updated>2024-03-05T02:05:07+00:00/updated>
media:group>
media:title>Setup Zyxel NWA50AX Access Point with Nebula Mobile App/media:title>
media:content url="https://www.youtube.com/v/DWIhIUDWX0Q?version=3" type="application/x-shockwave-flash" width="640" height="390"/>
media:thumbnail url="https://i1.ytimg.com/vi/DWIhIUDWX0Q/hqdefault.jpg" width="480" height="360"/>
media:description>In this video, I will show you how to setup Zyxel access point with the Nebula Mobile App. For this video, I use the Zyxel NWA50AX; however, the procedure is the same and you can use it for other Zyxel access points.
Basically, it is very easy to get your AP setup in just a few minutes:
1. Download the Zyxel Mobile App
2. Sign up or Login with your Zyxel account
3. Scan the QR code on the box to add the device.
4. Setup WiFi & turn on Smart Mesh
And that is all. Pretty simple, is it!
If this video is too long, you can find the shorter version by Zyxel, here https://youtu.be/cSyD29ErI24
Zyxel NWA50AX product page: https://www.zyxel.com/vn/vi/products/wireless/802-11ax-wifi-6-dual-radio-poe-access-point-nwa50ax
Zyxel Facebook: https://www.facebook.com/ZyxelVietnam
Where to buy:
- Zyxel Resellers: https://www.zyxel.com/global/en/where-to-buy/locate-partner
- Shopee: https://bit.ly/ZySHP_NWA50AX
- LAZADA: https://bit.ly/ZyLAD_NWA50AX
That is all. Thanks for watching and see you in the next update!/media:description>
media:community>
media:starRating count="15" average="5.00" min="1" max="5"/>
media:statistics views="1524"/>
/media:community>
/media:group>
/entry>
entry>
id>yt:video:WTbhETwBUTE/id>
yt:videoId>WTbhETwBUTE/yt:videoId>
yt:channelId>UCczXrZ5r1nCMACiaipGqbtw/yt:channelId>
title>Zyxel NWA50AX - Smart Mesh Configuration & Throughput Test/title>
link rel="alternate" href="https://www.youtube.com/watch?v=WTbhETwBUTE"/>
author>
name>Van Tech Corner/name>
uri>https://www.youtube.com/channel/UCczXrZ5r1nCMACiaipGqbtw/uri>
/author>
published>2023-08-06T15:00:31+00:00/published>
updated>2024-03-02T17:28:52+00:00/updated>
media:group>
media:title>Zyxel NWA50AX - Smart Mesh Configuration & Throughput Test/media:title>
media:content url="https://www.youtube.com/v/WTbhETwBUTE?version=3" type="application/x-shockwave-flash" width="640" height="390"/>
media:thumbnail url="https://i4.ytimg.com/vi/WTbhETwBUTE/hqdefault.jpg" width="480" height="360"/>
media:description>In this video, we are going to enable Smart Mesh on the Zyxel NWA50AX. After that, let's check out the device's performance with Smart Mesh enabled. For this test, I will be using the OpenSpeedTest application which runs on the local server.
Video timeframe:
00:00 - Intro
00:20 - Enable Smart Mesh on Zyxel Nebula Control Center
01:07 - Devices Overvier (Actual Installation Location)
01:32 - Throughput when APs are connected via Ethernet cable
02:05 - Force the 2nd NWA50AX to use Wireless as Uplink
02:38 - Throughput when 2nd AP connected to a Wireless Uplink (Mesh)
03:00 - Adjust the position of the 1st AP to enhance connectivity
03:32 - Throughput test after changing the AP's position
04:00 - Closing
Zyxel NWA50AX product page: https://www.zyxel.com/vn/vi/products/wireless/802-11ax-wifi-6-dual-radio-poe-access-point-nwa50ax
Zyxel Facebook: https://www.facebook.com/ZyxelVietnam
Where to buy:
- Shopee: https://bit.ly/ZySHP_NWA50AX
- LAZADA: https://bit.ly/ZyLAD_NWA50AX
Thanks for watching and see you in the next update!/media:description>
media:community>
media:starRating count="36" average="5.00" min="1" max="5"/>
media:statistics views="3512"/>
/media:community>
/media:group>
/entry>
entry>
id>yt:video:G3va7X4PZFo/id>
yt:videoId>G3va7X4PZFo/yt:videoId>
yt:channelId>UCczXrZ5r1nCMACiaipGqbtw/yt:channelId>
title>Replace ISP ONT/ONU - LEOX LXT-010S-H SFP GPON Module/title>
link rel="alternate" href="https://www.youtube.com/watch?v=G3va7X4PZFo"/>
author>
name>Van Tech Corner/name>
uri>https://www.youtube.com/channel/UCczXrZ5r1nCMACiaipGqbtw/uri>
/author>
published>2023-08-03T16:45:02+00:00/published>
updated>2024-03-02T05:10:04+00:00/updated>
media:group>
media:title>Replace ISP ONT/ONU - LEOX LXT-010S-H SFP GPON Module/media:title>
media:content url="https://www.youtube.com/v/G3va7X4PZFo?version=3" type="application/x-shockwave-flash" width="640" height="390"/>
media:thumbnail url="https://i4.ytimg.com/vi/G3va7X4PZFo/hqdefault.jpg" width="480" height="360"/>
media:description>In this video, I will replace the ISP provided ONT/ONU with the LEOX LXT-010S-H GPON SFP module. The LEOX LXT-010S-H is coming from LeoLabs, a company founded by South Poland ISP - Leon. It is powered by the Realtek RTL9601CI chipset and supports most of the popular OLTs, including Huawei, Dasan, ZTE, Zhone, Calix E7, Nokia/Alcatel-Lucent, Ericsson BLM1500, etc.
You can place an order directly from LeoLabs - sales@leolabs.pl
Below is some information of the setup:
ISP: Viettel
OLT: ZTE
ONT/ONU: Dasan H646GM-V
GPON SFP: LEOX LXT-010S-H (supports 1/2.5G GPON)
Media Converter: JUPLINK 2.5GbE
Router: NanoPi R6S (2.5GbE)
In other to replace the ISP provided ONT/ONU, we should clone (copy the information of the original device) to the new SFP/ONT so that it will report the same information to the OLT, to get authenticated. The information is vary, but basically it will be GPON Serial Number, ONU Model, PON Vendor ID, Hardware Version, Software Version and MAC Address.
You can check out my previous videos to learn more:
https://youtu.be/3g6mRDfUppQ
https://youtu.be/yD8aq4KSWko
https://youtu.be/ZI2U8wnJ4IQ
https://youtu.be/ib0XVeCJanM
LEOX LXT-010S-H home page: https://bit.ly/47kMrCg
LXT-010S-H User Guide: https://hack-gpon.org/ont-leox-lxt-010s-h/
Other resources: https://github.com/Anime4000/RTL960x
Timeframe:
00:00 - Intro
00:56 - Who is LeoLabs?
01:31 - The LEOX LXT-010S-H GPON SFP Module
01:59 - Current Setup (ISP provided ONT) Overview & Speedtest
05:43 - What information to clone (to the new GPON ONT/SFP)
06:51 - New Hardware Installation (LEOX LXT-010S-H, 2.5G Media Converter)
07:33 - Access the LXT-010S-H Web-UI (with OpenWrt)
10:33 - Configure the LXT-010S-H with Telnet (Must watch)
13:00 - Speedtest - Up to 2 Gbps Throughput
14:45 - Don't use OpenWrt? Only have SFP + Media Converter
Thanks for watching and see you in the next update!/media:description>
media:community>
media:starRating count="229" average="5.00" min="1" max="5"/>
media:statistics views="12586"/>
/media:community>
/media:group>
/entry>
entry>
id>yt:video:v-7v6yt1mVM/id>
yt:videoId>v-7v6yt1mVM/yt:videoId>
yt:channelId>UCczXrZ5r1nCMACiaipGqbtw/yt:channelId>
title>Zyxel NWA50AX WiFi 6 PoE Access Point - Overview & Standalone Setup/title>
link rel="alternate" href="https://www.youtube.com/watch?v=v-7v6yt1mVM"/>
author>
name>Van Tech Corner/name>
uri>https://www.youtube.com/channel/UCczXrZ5r1nCMACiaipGqbtw/uri>
/author>
published>2023-07-31T15:30:19+00:00/published>
updated>2024-04-10T19:20:51+00:00/updated>
media:group>
media:title>Zyxel NWA50AX WiFi 6 PoE Access Point - Overview & Standalone Setup/media:title>
media:content url="https://www.youtube.com/v/v-7v6yt1mVM?version=3" type="application/x-shockwave-flash" width="640" height="390"/>
media:thumbnail url="https://i3.ytimg.com/vi/v-7v6yt1mVM/hqdefault.jpg" width="480" height="360"/>
media:description>In this video, let's check out the NWA50AX Dual Radio WiFi 6 PoE Access Point from Zyxel. After that, I will walk you through the Web-UI and the initial setup in standalone mode. At the end, there will a quick speedtest using the PC and the mobile phone.
Standard: IEEE 802.11 ax/ac/n/g/b/a
MIMO: MU-MIMO
Wireless speed: 2.4GHz - 575 Mbps, 5GHz - 1200 Mbps
Bandwidth: 20-, 40-, 80-MHz
Supports Band steering, WDS/Mesh, Fast roaming and DCS, etc
Operating mode: Nebula cloud managed or Standalone
Video timeframe:
00:00 - Zyxel NWA50AX Features Overview
03:33 - What is inside the box
05:05 - Initial Setup (First Use Setup)
08:39 - Web-UI Walkthrough
15:05 - Connecting to the WiFi SSID
16:22 - Speedtest from PC (Intel AX210 to NWA50AX)
17:07 - Speedtest from phone
Resources:
- Zyxel NWA50AX product page: https://www.zyxel.com/vn/vi/products/wireless/802-11ax-wifi-6-dual-radio-poe-access-point-nwa50ax
- Zyxel Facebook: https://www.facebook.com/ZyxelVietnam
Where to buy:
- Shopee: https://bit.ly/ZySHP_NWA50AX
- LAZADA: https://bit.ly/ZyLAD_NWA50AX
Thanks for watching and see you in the next one!/media:description>
media:community>
media:starRating count="68" average="5.00" min="1" max="5"/>
media:statistics views="5657"/>
/media:community>
/media:group>
/entry>
entry>
id>yt:video:_vDxh1Ie8yM/id>
yt:videoId>_vDxh1Ie8yM/yt:videoId>
yt:channelId>UCczXrZ5r1nCMACiaipGqbtw/yt:channelId>
title>OpenWRT - Intel N5105 Router PC WiFi Module Install & Configuration (QCA9880)/title>
link rel="alternate" href="https://www.youtube.com/watch?v=_vDxh1Ie8yM"/>
author>
name>Van Tech Corner/name>
uri>https://www.youtube.com/channel/UCczXrZ5r1nCMACiaipGqbtw/uri>
/author>
published>2023-07-23T19:00:14+00:00/published>
updated>2024-03-02T10:31:04+00:00/updated>
media:group>
media:title>OpenWRT - Intel N5105 Router PC WiFi Module Install & Configuration (QCA9880)/media:title>
media:content url="https://www.youtube.com/v/_vDxh1Ie8yM?version=3" type="application/x-shockwave-flash" width="640" height="390"/>
media:thumbnail url="https://i4.ytimg.com/vi/_vDxh1Ie8yM/hqdefault.jpg" width="480" height="360"/>
media:description>In this video, I am going to install the Wallys DR900VX Wireless Module (Qualcomm-Atheros QCA9880 chipset) on the Intel N5105 Router PC and configure it. At the end, there will be a quick iperf3 throughput test.
Basically, the installation is very simple and you just need to install the below packages if you are using modules that is based on the QCA988x:
- ath10k-firmware-qca988x-ct (Alternative ath10k firmware for QCA988X from Candela Technologies.)
- kmod-ath10k-ct (ath10k-ct driver optimized for CT firmware)
- hostapd ( to enable 802.1x/WPA/EAP/RADIUS Authenticator)
Video timeframe:
00:00 - Intro & Hardware Overview
01:11 - Check if the Wireless Network Adapter is Detected (LuCI & lspci)
02:35 - Overview of firmware & driver for the QCA988x module
03:39 - Install QCA998x firmware & driver on LuCI
04:51 - Setup the WiFI SSID & Connection Check
07:28 - WiFi Throughput Test with iperf3
That's all for this video. Thanks for watching and see you in the next one!/media:description>
media:community>
media:starRating count="90" average="5.00" min="1" max="5"/>
media:statistics views="5489"/>
/media:community>
/media:group>
/entry>
/feed>
Van Tech Corner
01.08.2023 · 19:27:12 ···
26.03.2023 · 14:53:06 ···
06.04.2023 · 05:04:36 ··· 5 ··· ··· 31 ···
28.07.2024 · 00:33:36 ···
26.03.2023 · 14:53:06 ···
06.04.2023 · 05:04:36 ··· 5 ··· ··· 46 ···

1:: youyeetoo X1 SBC - Unboxing, Quick Overview and Booting up
01.01.1970 · 01:00:00 ··· 17.04.2024 · 11:30:02 ··· ··· ··· ··· ··· ··· youyeetoo X1 is an x86 Single Board Computer (SBC) which is powered by the Intel® Celeron 11'th Gen Jasper Lake N5105. It comes with soldered RAM and eMMC. You can select from 4GB, 8GB or 16GB of RAM to pair with No-eMMC, 64GB, 128GB and 256GB of eMMC. Besides typical Gigabit Ethernet port, M.2 port for NVMe/SATA SSD, the X1 SBC also allows you to access GPIO, SPI, I2C and UART, etc. You can also connect an external screen via MIPI, HDMI and micro-HDMI port.
With low power-consumption x86 CPU (TDP 10W), the youyeetoo X1 SBC is suitable for general-purpose applications since it can run both Windows and Linux. It is also a good choice for lightweight virtualization with Proxmox or VmWare EXSI.
You can find the X1 SBC here: https://www.youyeetoo.com/products/youyeetoo-x1-x86-single-board-computer?VariantsId=11287
Video timeframe:
00:00 - Unboxing the yooyeetoo X1 SBC
02:13 - Unboxing the metal casing for X1 SBC
03:01 - Unboxing the 7 Inch MIPI Display (with touch screen)
04:55 - Closer look at the yooyeetoo X1 I/O and connectors
07:31 - Power on the youyeetoo X1 SBC (Windows 11 pre-installed)
13:32 - Connect Ethernet cable, and a lot of Windows Updates
15:06 - Speedtest with Microsoft Edge
17:09 - Testing with WebGL Aquarium
18:38 - Video playback on Youtube
19:43 - What is next?
That is all for this video. Thanks for watching and see you all in the next one!

2:: GL-iNet Flint 2 - Peformance Test: WAN to LAN, WiFi, VPN Throughput
01.01.1970 · 01:00:00 ··· 19.03.2024 · 11:15:02 ··· ··· ··· ··· ··· ··· In the previous video, we already took a look at the GL-iNet Flint 2 (GL-MT6000). In this video, let's check out the device's performance by running the below tests:
- WAN to LAN throughput test with OpenSpeedTest and iPerf3
- Hardware Acceleration ON vs OFF
- Wireless (WiFi) Throughput in 5GHz channel
- OpenVPN Throughput
- Wireguard Throughput
Check out the Flint router: https://link.gl-inet.com/VanTechCorner
Buy it: https://link.gl-inet.com/storeVanTechCorner
Amazon ordering link:https://link.gl-inet.com/AmazonVanTechCorner
Video timeline:
00:00 - Intro
00:26 - Testing Diagram
01:15 - WAN to LAN Throughput Test (HW Acceleration ON)
04:29 - WAN to LAN Throughput Test (HW Acceleration OFF)
07:31 - Wireless (WiFi) Throughput
10:16 - OpenVPN Throughput Test
11:59 - Wireguard Throughput Test
That is all for this video. Thanks for watching and see you in the next video!

3:: GL-iNet Flint 2 - WiFi 6 AX6000, 2.5GbE Router - Overview, Setup and Speed Test
01.01.1970 · 01:00:00 ··· 10.03.2024 · 15:13:07 ··· ··· ··· ··· ··· ··· Flint 2 (GL-MT6000) is a high performance WiFi 6 router from GL-iNet. Powered by the MediaTek Filogic 830 (MT7986), the Flint 2 integrated a 4 cores, 64-bit CPU clocked at 2.0GHz. It is also comes with 1GB of DDR4 RAM and 8GB of eMMC storage
For I/O, the Flint 2 has 2 x 2.5 Gigabit Ethernet port, 4 x Gigabit Ethernet port, 6000 Mbps WiFi througput in total (AX6000) and a USB 3.0 port. The device supports dual-wan/multi-wan setup with Ethernet, Cellular & WiFi.
The device is running a customized version of OpenWrt 23.05. Right now, there is no information of official OpenWrt support, but I hope there will be good news soon.
Check out the Flint router: https://link.gl-inet.com/VanTechCorner
Buy it: https://link.gl-inet.com/storeVanTechCorner
Amazon ordering link:https://link.gl-inet.com/AmazonVanTechCorner
Video timeframe:
00:00 - Flint 2 (GL-MT6000) Intro & Specs Highlight
01:49 - Flint 2 - Features
02:44 - Ways to manage the Flint 2
03:09 - Unboxing the Flint 2 - What is inside the box?
03:49 - First time Setup (Internet)
05:35 - Acess Web Interface & Upgrade Firmware
07:27 - GL-iNet Web Interface Walk Through
12:36 - Enable IPv6 for Internet (WAN)
13:48 - PPPoE Throughput (Wired) - Hardware Acceleration Enabled
15:25 - PPPoE Throughput (Wired) - Hardware Acceleration Disabled
17:40 - PPPoE Throughput (WiFi) - Connection Overview
18:06 - PPPoE Throughput (WiFi) - Speedtest
19:19 - What is next?
In the next video, we will have further testing, such as WAN to LAN throughput test (both WAN and LAN 2.5GbE), OpenVPN and Wireguard VPN. We will also check out the NAS throughput with a USB 3.0 disk, and more.
Thanks for watching and see you in the next video!
4:: Raspberry Pi 5 - Official OpenWrt Support Firmware Throughput Test
01.01.1970 · 01:00:00 ··· 24.02.2024 · 11:30:19 ··· ··· ··· ··· ··· ··· Finanlly, the Raspberry Pi 5 received official OpenWrt support. In this video, I will run a simple WAN to LAN throughput test with OpenSpeedTest and iperf3.
Since the Raspberry Pi 5 only has 1 network port, I used a USB 3.0 to Ethernet adapter as the WAN interface.
For this test, I used 2 USB to Ethernet adapter:
- D-Link DUB-1213 USB 3.0 to Gigabit Ethernet Adapter (ASIX AX88179)
- No-Brand USB 3.0 to 2.5 Gigabit Ethernet Adapter (Realtek RTL8156B)
Check out the video for more information.
You can find the products in the below URL (affilate)
Raspberry Pi 5 - https://my.cytron.io/p-raspberry-pi-5?tracking=vantech
Build the firmware: https://firmware-selector.openwrt.org/
Driver packages:
https://openwrt.org/packages/pkgdata/kmod-usb-net-asix-ax88179
https://openwrt.org/packages/pkgdata/kmod-usb-net-rtl8152
Video timeframe:
00:00 - Intro
00:29 - USB 3.0 to Ethernet Adapters for the Raspberry Pi 5
01:21 - Build OpenWrt firmware for Pi 5 with LuCI & drivers
02:37 - Enable Software Offloading & Packet Steering
03:08 - Throughput Test - D-Link DUB-1312
03:34 - Throughput Test - No-Brand 2.5GbE Adapter
Thanks for watching and see you in the next video!

5:: Raspberry Pi 5 - OpenWrt Install & Performance Test
01.01.1970 · 01:00:00 ··· 21.01.2024 · 11:30:20 ··· ··· ··· ··· ··· ··· In this video, I am going to install OpenWrt on the Raspberry Pi 5. After that, let's have some performance tests, including WAN to LAN throughput with OpenSpeedTest and iPerf3, OpenVPN and Wireguard VPN throughput.
Since the Raspberry Pi 5 only has 1 x Ethernet port, I used the D-Link DUB-1312 USB to Ethernet adapter as the WAN port. The onboard Ethernet port was configured as LAN.
OpenWrt for Raspberry Pi 5 - https://github.com/mj22226/openwrt/releases/tag/bcm2712-6.1
PR to add support for RPI 5 - https://github.com/openwrt/openwrt/pull/13987
You can find the products in the below URL (affilate)
Raspberry Pi 5 - https://my.cytron.io/p-raspberry-pi-5?tracking=vantech
D-Link DUB-1312 - https://amzn.to/3U8A8oy
00:00 - Intro
00:34 - Download & Burn OpenWrt to microSD card
00:55 - Hardware Setup
01:56 - Power on the Raspberry Pi 5 with OpenWrt
02:17 - Access the LuCI Web Interface
03:06 - WAN to LAN Throughput Test
04:30 - OpenVPN Throughput Test
06:31 - Wireguard VPN Throughput Test
07:56 - Conclusion
Thanks for watching and see you in the next video!

6:: FriendlyElec NanoPC-T6 Overview & Quick Test
01.01.1970 · 01:00:00 ··· 28.11.2023 · 16:00:19 ··· ··· ··· ··· ··· ··· This video will show you the overview of the NanoPC-T6 - a high performance edge computing Single Board Computer from FriendlyElec.
The NanoPC-T6 was built on the Rockchip RK3588 SoC. It comes with an 8-cores CPU: 4 x ARM Cortex-A76 cores & 4 x ARM Cortex-A55 cores, 6TOPS NPU, the Mali-G610 MP4 GPU and the intergrated VPU supports upto 8K video econding & decoding.
For connectity, the NanoPC-T6 comes with 2 x 2.5GbE ports, an M.2 M-Key connector for NVMe SSD, an M.2 E-Key connector for WiFi & Bluetooth module, and a Mini-PCIe connector for 4G/5G module. This makes the NanoPC-T6 suitable for different applications and usages.
You can purchase the NanoPC-T6 from the WayPonDev store on Amazon:
https://amzn.to/3sXowcD
NanoPC-T6 4+32GB: https://www.amazon.com/dp/B0C4YPCR96?ref=myiVan Tech Corner :: YouTUBE Kanaldp
NanoPC-T6 8+64GB: https://www.amazon.com/dp/B0C4YPVQ8Q?ref=myiVan Tech Corner :: YouTUBE Kanaldp
NanoPC-T6 16+128GB: https://www.amazon.com/dp/B0C4YQT8XY?ref=myiVan Tech Corner :: YouTUBE Kanaldp
With M.2 Wifi Module Bundle
NanoPC-T6 4+32GB: https://www.amazon.com/dp/B0C4TN1SKH?ref=myiVan Tech Corner :: YouTUBE Kanaldp
NanoPC-T6 8+64GB: https://www.amazon.com/dp/B0C4TQXRTS?ref=myiVan Tech Corner :: YouTUBE Kanaldp
NanoPC-T6 16+128GB: https://www.amazon.com/dp/B0C4TQ8BG4?ref=myiVan Tech Corner :: YouTUBE Kanaldp
Video timeframe:
00:00 - NanoPC-T6 Highlight
00:42 - Version & Pricing
01:06 - NanoPC-T6's IO
02:09 - Closer look at the PCB components
05:21 - Hardware Setup
05:44 - NanoPC-T6 First Boot (Ubuntu)
05:56 - Wireless Connectivity Test (WiFi & LTE)
06:48 - Ethernet Connectivity Test
07:05 - eMMC Speed Test (hdparm)
07:20 - Video Playback & GPU Performance
08:32 - Next Video Preview
Thanks for watching and see you in the next one!

7:: Replace ISP ONT/ONU - HSGQ SFP XPON ONU Stick
01.01.1970 · 01:00:00 ··· 29.10.2023 · 11:30:30 ··· ··· ··· ··· ··· ··· In this video, we will take a look at the the XPON ONU Stick from HSGQ. The video will walk you through the Web Interface of the XPON ONU Stick and the process of replacing the ISP provided ONT/ONU with this SFP XPON module. (XPON means the SFP supports both GPON and EPON)
In this setup, the HSGQ is connected to the 2.5G Media Converter. The RJ45 port of the Media Converter is connected to the WAN port of the Nano Pi R6S.
If this is your first attempt replacing the ISP provided device, you can check out the below videos for more information:
What is OLT & ONT/ONU - Hisense GPON LTE3415 https://youtu.be/yD8aq4KSWko?si=HPIykg9wbIwhWMe1
LEOX LXT-010S-H SFP GPON Module https://youtu.be/G3va7X4PZFo?si=zqYoP1OJfMvWymPP
NOKIA GPON SFP G-010S-A https://youtu.be/3g6mRDfUppQ?si=51u7USKel5ZUWn1q
Ubiquiti UFiber LOCO https://youtu.be/ZI2U8wnJ4IQ?si=MJJtPJK4uJFV7TV3
Besides the Web Interface, you can also configure the SFP module via Telnet. The commands are the same with other Realtek GPON SFP, such as the ODI DFP-34G-2C2 and the LEOX LXT-010S-H.
Video timeframe:
00:00 - Intro
00:29 - A short history of ODI/HSGQ SFP PON Stick
01:06 - Overview of the HSGQ SFP XPON ONU Stick
01:54 - Getting Started - Connecting the Hardware
02:21 - Access the HSGQ SFP XPON Web Interface
04:04 - The PON Tab - XPON (GPON/EPON status)
04:46 - The PON Settings (where you configure most of the thing)
06:18 - MAC & MACKEY (must see)
07:13 - VLAN Setting (Auto/Manual Transparent or PVID)
07:53 - Clone the OMCI value from the ISP provided ONT
09:02 - Check the PON Authenticate Status (O5 = good to go)
09:28 - Set up PPPoE on the NanoPi R6S
12:08 - Some Speedtests
13:53 - More about the VLAN tagging on the XPON SFP Module
Special thanks to Đông Vũ for lending me the HSGQ XPON SFP module.
Thank you for watching and see you in the next video!
8:: Install OpenWrt 23 on Banana Pi R2 PRO & PPPoE Speedtest
01.01.1970 · 01:00:00 ··· 30.09.2023 · 15:00:57 ··· ··· ··· ··· ··· ··· In this video, I will show you how to install the latest OpenWrt version on the Banana Pi R2 PRO internal eMMC. (OpenWrt 23.02 snapshot). After that, let's check out the PPPoE throughput with VLAN (packet steering on).
OpenWrt 21.02 firmware provided by Banana Pi is out of date and there are problems with DSA, for example VLAN is not working fine. Fortunately, mj22226 and other developers are maintaining an up-to-date OpenWrt version which can be used for the BPI-R2-PRO and other SBC with Rockchip SoC, such as the NanoPi R4S, Rock Pi 4, etc. In this video, I will use OpenWrt from him.
You can check out the guide at: https://vantc.net/install-openwrt-23-snapshot-firmware-on-banana-pi-bpi-r2-pro.html
Video timeframe:
00:00 - Intro
00:35 - OpenWrt firmware from mj2226 (Marty Jones)
01:21 - Create microSD card to boot OpenWrt
01:35 - Boot OpenWrt on microSD card with MASKROOM button
02:04 - Flash OpenWrt to the internal eMMC storage
02:34 - Boot OpenWrt from internal eMMC storage
02:52 - Install the latest OpenWrt firmware for the BPI-R2-PRO
03:29 - Test Overview
03:49 - PPPoE with VLAN - Speedtest - SW Offloading Enabled
04:17 - PPPoE with VLAN - Speedtest - SW Offloading Disabled
BPI R2 PRO Wiki - https://wiki.banana-pi.org/Getting_Started_with_R2PRO#introduction
Thanks for watching and see you again!

9:: Linksys WRT1900AC V1 (throughput) is broken after DSA migration (OpenWrt 21/22/23)
01.01.1970 · 01:00:00 ··· 10.09.2023 · 13:15:00 ··· ··· ··· ··· ··· ··· The Linksys WRT1900AC's throughput is very poor after upgraded to OpenWrt 21, 22 and 23 where DSA replaced swconfig.
With OpenWrt 19, the Linksys WRT1900AC V1 can handle Gigabit (940Mbps) WAN to LAN throughput. However, it only does 350/800 Mbps with OpenWrt 21/22/23 (PPPoE). WAN to LAN throughput better for DHCP (780/660 Mbps), but still far away from the expected throughput.
For now, the only solution I have to improve the performance is downgrading the WRT1900AC to OpenWrt 19 where swconfig is being used. If you have any idea how to get a better throughput/performance with OpenWrt 21/22/23, please share in the comment section.
WRT1900 return to stock firmware - https://openwrt.org/toh/linksys/wrt1900ac#return_to_stock_firmware
Video timeframe:
00:00 - Intro & Story
01:15 - WRT1900AC V1 Throughput with OpenWrt 22 (DSA)
02:32 - Failed to Downgrade from OpenWrt 22 to OpenWrt 19 using LuCI
03:16 - Revert / Return Linksys WRT1900AC V1 to stock firmware
03:51 - Install OpenWrt 19 from Linksys Stock Firmware
04:20 - Configure PPPoE with VLAN tagging
04:54 - PPPoE throughput - SW Offloading Disabled
05:12 - PPPoE throughput - SW Offloading Enabled
05:46 - Configure PPPoE with no VLAN tagging & throughput
06:23 - Final words
That is all. Thanks for watching and see you in the next video!

10:: OpenWrt 22.03 - File Sharing with Samba4 - NVMe NAS test with NanoPi R6C
01.01.1970 · 01:00:00 ··· 27.08.2023 · 11:15:01 ··· ··· ··· ··· ··· ··· In this video, I will show you how to install Samba4 on OpenWrt. For the test, I used the NanoPi R6C, the Intel Optane NVMe SSD (16GB) and a 5V/3A power supply. At the end, we will run a simple disk benchmark test with CrystalDiskMark. At the same time, let's check out the NanoPi R6C's power consumption when the test is running.
The video will walk you through:
+ Configure Storage (USB/SSD/HDD/NVMe)
+ Create Disk partition & File system
+ Mount the partition on OpenWrt/Linux
+ Install & Configure Samba4
Link to the command/doc: https://vantc.net/setup-file-sharing-smb-on-openwrt-with-samba4.html
Video timeframe:
00:00 - Intro
00:26 - Video content
00:53 - Why I make this video?
01:49 - To get started, you will need
02:24 - Establish SSH connection to the router
02:56 - Configure Storage on OpenWrt
03:54 - Check if Storage device (USB/SSD/HDD) is detected
04:54 - Create a partition on the disk
06:44 - Create a file system (ext4)
08:06 - Mount the partition with LuCI
09:35 - Check if the mount is working
10:25 - Install & Configure Samba4
12:13 - Create SMB (Samba) User & Password
14:11 - Map the Network Drive on Windows
14:45 - Can't write to the Network Drive - Troubleshoot
15:34 - File transferring speedtest
17:14 - Disk Benchmark & Power Consumption
18:29 - Advanced configuration
18:50 - Note for Windows users
You can find the NanoPi R6C on Amazon (affiliate)
R6C 4GB RAM - no eMMC: https://amzn.to/45pF4Il
R6C 8GB RAM - 32GB eMMC: https://amzn.to/3QWiaDT
Thanks for watching and see you guys in the next video!

11:: Setup Zyxel NWA50AX Access Point with Nebula Mobile App
01.01.1970 · 01:00:00 ··· 13.08.2023 · 13:00:15 ··· ··· ··· ··· ··· ··· In this video, I will show you how to setup Zyxel access point with the Nebula Mobile App. For this video, I use the Zyxel NWA50AX; however, the procedure is the same and you can use it for other Zyxel access points.
Basically, it is very easy to get your AP setup in just a few minutes:
1. Download the Zyxel Mobile App
2. Sign up or Login with your Zyxel account
3. Scan the QR code on the box to add the device.
4. Setup WiFi & turn on Smart Mesh
And that is all. Pretty simple, is it!
If this video is too long, you can find the shorter version by Zyxel, here https://youtu.be/cSyD29ErI24
Zyxel NWA50AX product page: https://www.zyxel.com/vn/vi/products/wireless/802-11ax-wifi-6-dual-radio-poe-access-point-nwa50ax
Zyxel Facebook: https://www.facebook.com/ZyxelVietnam
Where to buy:
- Zyxel Resellers: https://www.zyxel.com/global/en/where-to-buy/locate-partner
- Shopee: https://bit.ly/ZySHP_NWA50AX
- LAZADA: https://bit.ly/ZyLAD_NWA50AX
That is all. Thanks for watching and see you in the next update!

12:: Zyxel NWA50AX - Smart Mesh Configuration & Throughput Test
01.01.1970 · 01:00:00 ··· 06.08.2023 · 15:00:31 ··· ··· ··· ··· ··· ··· In this video, we are going to enable Smart Mesh on the Zyxel NWA50AX. After that, let's check out the device's performance with Smart Mesh enabled. For this test, I will be using the OpenSpeedTest application which runs on the local server.
Video timeframe:
00:00 - Intro
00:20 - Enable Smart Mesh on Zyxel Nebula Control Center
01:07 - Devices Overvier (Actual Installation Location)
01:32 - Throughput when APs are connected via Ethernet cable
02:05 - Force the 2nd NWA50AX to use Wireless as Uplink
02:38 - Throughput when 2nd AP connected to a Wireless Uplink (Mesh)
03:00 - Adjust the position of the 1st AP to enhance connectivity
03:32 - Throughput test after changing the AP's position
04:00 - Closing
Zyxel NWA50AX product page: https://www.zyxel.com/vn/vi/products/wireless/802-11ax-wifi-6-dual-radio-poe-access-point-nwa50ax
Zyxel Facebook: https://www.facebook.com/ZyxelVietnam
Where to buy:
- Shopee: https://bit.ly/ZySHP_NWA50AX
- LAZADA: https://bit.ly/ZyLAD_NWA50AX
Thanks for watching and see you in the next update!

13:: Replace ISP ONT/ONU - LEOX LXT-010S-H SFP GPON Module
01.01.1970 · 01:00:00 ··· 03.08.2023 · 16:45:02 ··· ··· ··· ··· ··· ··· In this video, I will replace the ISP provided ONT/ONU with the LEOX LXT-010S-H GPON SFP module. The LEOX LXT-010S-H is coming from LeoLabs, a company founded by South Poland ISP - Leon. It is powered by the Realtek RTL9601CI chipset and supports most of the popular OLTs, including Huawei, Dasan, ZTE, Zhone, Calix E7, Nokia/Alcatel-Lucent, Ericsson BLM1500, etc.
You can place an order directly from LeoLabs - sales@leolabs.pl
Below is some information of the setup:
ISP: Viettel
OLT: ZTE
ONT/ONU: Dasan H646GM-V
GPON SFP: LEOX LXT-010S-H (supports 1/2.5G GPON)
Media Converter: JUPLINK 2.5GbE
Router: NanoPi R6S (2.5GbE)
In other to replace the ISP provided ONT/ONU, we should clone (copy the information of the original device) to the new SFP/ONT so that it will report the same information to the OLT, to get authenticated. The information is vary, but basically it will be GPON Serial Number, ONU Model, PON Vendor ID, Hardware Version, Software Version and MAC Address.
You can check out my previous videos to learn more:
https://youtu.be/3g6mRDfUppQ
https://youtu.be/yD8aq4KSWko
https://youtu.be/ZI2U8wnJ4IQ
https://youtu.be/ib0XVeCJanM
LEOX LXT-010S-H home page: https://bit.ly/47kMrCg
LXT-010S-H User Guide: https://hack-gpon.org/ont-leox-lxt-010s-h/
Other resources: https://github.com/Anime4000/RTL960x
Timeframe:
00:00 - Intro
00:56 - Who is LeoLabs?
01:31 - The LEOX LXT-010S-H GPON SFP Module
01:59 - Current Setup (ISP provided ONT) Overview & Speedtest
05:43 - What information to clone (to the new GPON ONT/SFP)
06:51 - New Hardware Installation (LEOX LXT-010S-H, 2.5G Media Converter)
07:33 - Access the LXT-010S-H Web-UI (with OpenWrt)
10:33 - Configure the LXT-010S-H with Telnet (Must watch)
13:00 - Speedtest - Up to 2 Gbps Throughput
14:45 - Don't use OpenWrt? Only have SFP + Media Converter
Thanks for watching and see you in the next update!

14:: Zyxel NWA50AX WiFi 6 PoE Access Point - Overview & Standalone Setup
01.01.1970 · 01:00:00 ··· 31.07.2023 · 15:30:19 ··· ··· ··· ··· ··· ··· In this video, let's check out the NWA50AX Dual Radio WiFi 6 PoE Access Point from Zyxel. After that, I will walk you through the Web-UI and the initial setup in standalone mode. At the end, there will a quick speedtest using the PC and the mobile phone.
Standard: IEEE 802.11 ax/ac/n/g/b/a
MIMO: MU-MIMO
Wireless speed: 2.4GHz - 575 Mbps, 5GHz - 1200 Mbps
Bandwidth: 20-, 40-, 80-MHz
Supports Band steering, WDS/Mesh, Fast roaming and DCS, etc
Operating mode: Nebula cloud managed or Standalone
Video timeframe:
00:00 - Zyxel NWA50AX Features Overview
03:33 - What is inside the box
05:05 - Initial Setup (First Use Setup)
08:39 - Web-UI Walkthrough
15:05 - Connecting to the WiFi SSID
16:22 - Speedtest from PC (Intel AX210 to NWA50AX)
17:07 - Speedtest from phone
Resources:
- Zyxel NWA50AX product page: https://www.zyxel.com/vn/vi/products/wireless/802-11ax-wifi-6-dual-radio-poe-access-point-nwa50ax
- Zyxel Facebook: https://www.facebook.com/ZyxelVietnam
Where to buy:
- Shopee: https://bit.ly/ZySHP_NWA50AX
- LAZADA: https://bit.ly/ZyLAD_NWA50AX
Thanks for watching and see you in the next one!
15:: OpenWRT - Intel N5105 Router PC WiFi Module Install & Configuration (QCA9880)
01.01.1970 · 01:00:00 ··· 23.07.2023 · 19:00:14 ··· ··· ··· ··· ··· ··· In this video, I am going to install the Wallys DR900VX Wireless Module (Qualcomm-Atheros QCA9880 chipset) on the Intel N5105 Router PC and configure it. At the end, there will be a quick iperf3 throughput test.
Basically, the installation is very simple and you just need to install the below packages if you are using modules that is based on the QCA988x:
- ath10k-firmware-qca988x-ct (Alternative ath10k firmware for QCA988X from Candela Technologies.)
- kmod-ath10k-ct (ath10k-ct driver optimized for CT firmware)
- hostapd ( to enable 802.1x/WPA/EAP/RADIUS Authenticator)
Video timeframe:
00:00 - Intro & Hardware Overview
01:11 - Check if the Wireless Network Adapter is Detected (LuCI & lspci)
02:35 - Overview of firmware & driver for the QCA988x module
03:39 - Install QCA998x firmware & driver on LuCI
04:51 - Setup the WiFI SSID & Connection Check
07:28 - WiFi Throughput Test with iperf3
That's all for this video. Thanks for watching and see you in the next one!

16:: Configure Cellular Data (4G/LTE/3G) on GL-iNet Routers
01.01.1970 · 01:00:00 ··· 29.06.2023 · 14:30:02 ··· ··· ··· ··· ··· ··· In this short video, I will show the installation of a LTE module on GL-iNet routers. After that, we will setup the cellular connection to access the Internet.
The videos can be applied on all GL-iNet routers that run stock firmware and has a USB port, such as the Beryl AX GL-MT300, Flint GL-AX1800, Beryl -MT1300, etc.
The drivers & kernel modules for 4G/LTE/3G had been pre-installed on GL-iNet firmware. Therefore setup is just plug-and-play. All you need to do is press the "Auto Setup" to establish the connection. However, you can have advanced settings with "Manual Setup".
Video timeframe:
00:00 - Intro & LTE Module Hardware Overview
00:51 - Access GL-iNet Dashboard
01:38 - Auto Setup the Cellular Data
02:17 - Speedtest
03:21 - Manual Setup the Cellular Data
04:11 - Modem Management
Resources:
- The Beryl AX - https://bit.ly/3HAS18M
- If you are using OpenWrt, see this video https://youtu.be/87izvwhflEc
Components (affiliate)
- Beryl AX (Amazon) - https://amzn.to/3Jj6cjO
- USB to Mini-PCIe Adapter for LTE - https://amzn.to/431D2Mm
- Quectel EC25 (for US) - https://amzn.to/46yGscL
- USB to Mini-PCIe, Antenas & Cable kit - https://amzn.to/3CLYIl6 (if your PC don't have Mini-PCIe & simcard slot)
Thanks for watching and see you in the next video!

17:: OpenWRT - Intel N5105 Router PC LTE/4G Module Install & Configuration (QMI Mode)
01.01.1970 · 01:00:00 ··· 24.06.2023 · 14:15:00 ··· ··· ··· ··· ··· ··· In this video, I will show you how to install & configure the 5G/4G/3G module in OpenWRT with ModemManager. For the hardware, I used the Intel N5105 2.5GbE Router PC and the Quectel EC25E module.
Besides x86, the guide can be applied for most of the routers running OpenWrt, no matter it is ARM-based devices such as the NanoPi R6S, NanoPi R4S or MIPS-based devices such as the Xiaomi R3G, Xiaomi Router 4, etc.
In order to use with ModemManager, it is recommended that the 4G module is working on the QMI USB mode. You can change the USB mode to QMI with AT+QCFG=“usbnet”,0 command (if you are using Quectel module).
Video timeframe:
00:00 - Intro
00:53 - The Quectel EC25 4G module
01:42 - The USB to Mini-PCIe adapter (USB bus)
02:42 - The IPEX to SMA-Female cable
03:19 - The cellular antenas (SMA-Male connector)
03:45 - Install the Quectel EC25 module on the Intel N5105 Router PC
05:28 - Download & Install OpenWrt 22.03 on the USB drive
06:53 - Connect Ethernet cables & Boot up the Router PC
08:15 - Access LuCI & Walkthrough
09:56 - Overview of the installation procedure
11:10 - Install the Kernel modules for 5G/4G/3G support
12:02 - Install ModemManager & luci-proto-modemmanager
12:42 - Install minicom
13:45 - Connect to the LTE modem with minicom
14:30 - Check the network operator, signal and band
15:41 - Reboot the router before proceed
16:11 - Remove Ethernet to the WAN port (to use LTE only)
16:31 - Setup the LTE interface on LuCI
20:00 - Change the LTE module USB mode (QMI, CDC_MBIM, etc)
Resources:
- ModemManager docs - https://openwrt.org/docs/guide-user/network/wan/wwan/modemmanager
- Advanced guide for QMI mode - https://openwrt.org/docs/guide-user/network/wan/wwan/ltedongle
Components (affiliate)
- USB to Mini-PCIe Adapter for LTE - https://amzn.to/431D2Mm
- Quectel EC25 (for US) - https://amzn.to/46yGscL
- USB to Mini-PCIe, Antenas & Cable kit - https://amzn.to/3CLYIl6 (if your PC don't have Mini-PCIe & simcard slot)
Thanks for watching and good luck!
18:: Beryl AX Real Life WiFi Performance Test (GL-MT3000)
01.01.1970 · 01:00:00 ··· 18.06.2023 · 12:00:21 ··· ··· ··· ··· ··· ··· This video will show you the WiFi performance of the Beryl AX in real life. The test was done with a WiFi 6 capable device - the Samsung S10. Please note that this is not the highest throughput since the Samsung S10 is quite old and only supports HE80 (80MHz bandwidth).
The Beryl AX is located on the 1st floor and I have walk upstair to the 2nd floor. With a thick layer of concrete in between, I still got up to 200 Mbps throughput with OpenSpeedTest.
Do check out the video for detail test.
Video timeframe:
00:00 Intro & Overview of the Devices & Setup
00:47 Test 1 - 2m away from the AP
01:23 Test 2 - 5m away from the AP - Visible line
02:00 Test 3 - 10m away from the AP - Thick concrete in between
02:26 Test 4 - 12m away from the AP - Obstacles and thick wall
That is all for this video. Thanks for watching and see you in the next one!

19:: 2Gbps WiFi Throughput with GL-iNet Beryl AX (GL-MT3000)
01.01.1970 · 01:00:00 ··· 26.05.2023 · 12:00:20 ··· ··· ··· ··· ··· ··· In this video, we will check out the WiFi throughput of the Beryl AX in 80MHz and 160MHz. The tests will be done with OpenSpeedTest and iPerf3.
This is a WAN to LAN test. The Beryl AX is connected to the upstream router with a 2.5Gbps Link Speed. The PC is connected to Beryl AX with the Intel AX210 Wi-Fi 6E module. The OpenSpeedTest and iPerf3 server is running on the WAN side. No advanced configuration is done, the Beryl AX is running stock OpenWrt firmware from GL-iNet.
The result is very interesting. After the bandwidth changed to 160MHz, the Link Speed between the PC and the Beryl AX is now 2402Mbps. The OpenSpeedTest result is closed to 2Gbps while iPerf3 throughput is 1.3Gbps.
Video timeframe:
00:00 - Intro
01:25 - WiFi Throughput in 80MHz (default configuration)
02:00 - Change the 5GHz WiFi bandwidth to 160MHz
03:08 - WiFi Throughput in 160MHz - OpenSpeedTest
04:18 - WiFi Speedtest & CPU Usage Overview
05:34 - WiFi Throughput in 160MHz - iperf3
Beryl AX Unboxing & Review - https://youtu.be/1is6m-xBeKY
The Beryl AX is available on the GL-iNet Webstore - https://bit.ly/3HAS18M
You can also find in on Amazon https://amzn.to/3Jj6cjO
Thanks for watching and see you in the next video!

20:: NanoPi R6C - Power Consumption & Throughput Test
01.01.1970 · 01:00:00 ··· 18.05.2023 · 15:15:05 ··· ··· ··· ··· ··· ··· In this video, let's take a look at the power consumption of the NanoPi R6C during boot up, idle and full load. We will also check out the R6C WAN to LAN throughput with OpenSpeedTest and iPerf3. At the end of the video, there will be OpenVPN and Wireguard VPN throughput tests.
The NanoPi R6C is a "lite" version of the NanoPi R6S. It has the same Rockchip RK3588S SoC, but the WAN port is only Gigabit Ethernet to save the throughput for the M.2 PCIe connector. At the time of testing, the NanoPi R6C is running the latest version of FriendlyWrt. It is a fork of OpenWrt.
Quick summary:
- PPPoE : 940Mbps @ 3.5W
- LAN to LAN iPerf3: 2.36Gbps @ 5W
- OpenVPN: 448 Mbps
- Wireguard VPN: 880 Mbps @ 4.5W
NanoPi R6C Review https://youtu.be/VgjLQY8MfCk
NanoPi R6S Review https://youtu.be/-rlJ_80d01U
Video time frame:
00:00 - Intro
00:46 - NanoPi R6C Power Consumption (boot up/idle/full load)
01:19 - Power Consumption with the NVMe SSD installed
01:49 - 940Mbps PPPoE SpeedTest - CPU Load & Power Draw
02:22 - 2.36Gbps LAN to LAN iPerf - CPU Load & Power Draw
02:59 - NanoPi R6C OpenVPN Throughput (OpenSpeedTest & iPerf3)
03:34 - NanoPi R6C Wireguard VPN Throughput (OpenSpeedTest & iPerf3)
Where to get the R6C:
- Official store: https://www.friendlyelec.com/index.php?route=product/product&product_id=291
- R6C 4G RAM no eMMC - https://amzn.to/3pSZXf9 (Amazon US affiliate)
- R6C 8GB RAM 32GB eMMC - https://amzn.to/42NQzb0 (Amazon US affiliate)
That is all for the test. Thanks for watching and see you all in the next video!
21:: The NanoPi R5S - 2.35Gbps WAN to LAN Throughput
01.01.1970 · 01:00:00 ··· 04.05.2023 · 15:30:06 ··· ··· ··· ··· ··· ··· The purpose of this video is to show you that the NanoPi R5S can handle 2.35Gbps WAN to LAN throughput with FullCone NAT, Software Offloading and Packet Steering enabled.
On my previous video https://youtu.be/Wq3L9qlWSvQ which was recorded on Aug 2022, the NanoPi R5S can't handle 2Gbps throughput. After a few months, with the firmware update released on Dec 2022, the NanoPi R5S can handle 2.35Gbps WAN to LAN throughput with no problem.
This video was recorded on the very last day of Dec 2022 and I was totally forget about this. However, I still upload this video now (May 2023) to correct/update my previous testing result.
Video timeframe:
00:00 - Intro
00:47 - Update the NanoPi R5S firmware with microSD card
04:31 - Change the WAN port to 2.5GbE
07:20 - OpenSpeedTest (Packet Steering, FullCone NAT, SW Offloading)
08:21 - iPerf3 (Normal, Reverse, Multi-Streams)
10:18 - What if I disable SW Offloading & FullCone NAT
NanoPi R5S latest firmware - https://dl.friendlyelec.com/nanopir5s
That will be all for this video. Thanks for watching and see you all in the next one!

22:: Replace ISP ONT/ONU - Ubiquiti UFiber LOCO - Overview & Configuration
01.01.1970 · 01:00:00 ··· 02.05.2023 · 16:00:18 ··· ··· ··· ··· ··· ··· In this video, I will show you an overview of the UFiber LOCO and how to configure it with the UFiber.Configurator application. As an example, we will clone the information of an ZTE ONT to the UFiber LOCO. The information cloned are the GPON Serial Number, PON Vendor ID and WAN mac address.
Besides the Ubiquiti UISP OLT, the UFiber LOCO/UFiber Nano also support third-party OLT such as Huawei MA5608T, MA5683T, MA5800-X15, MA5800-X7, FiberHome AN5516-04 and ZTE ZXA10, .etc. However, it may not work with your current ISP's OLT. Therefore, before purchasing, check the compatibility first.
- Buy the U Fiber LOCO - https://amzn.to/3HyQUWx (Amazon affiliate)
- UFiber GPON - Supported Third-Party OLTs - https://help.ui.com/hc/en-us/articles/115009335068-UFiber-GPON-Supported-Third-Party-OLTs
- Download UFiber.Configurator - https://github.com/Unifi-Tools/UFiber.Configurator
- Other videos on replacing ISP's ONT/ONU - https://youtu.be/3g6mRDfUppQ, https://youtu.be/yD8aq4KSWko and https://youtu.be/H8aTjxx3ff4
Note: The UFiber LOCO (UF-LOCO) can be powered by either 5V microB USB port or 24V passive PoE, while the UFiber Nano (UF-NANO) can only be powered by the 5V microB USB port.
Video timeframe
00:00 - Intro
00:35 - Unbox the UFiber LOCO & Overview
02:10 - UFiber LOCO vs. UFiber Nano Differences
02:40 - Ubiquiti UFiber LOCO OLT Compatibility Check
04:17 - Replace the ISP's ONT with UFiber LOCO
06:35 - Access the UFiber LOCO Web Dashboard (ubnt/ubnt)
08:02 - UFiber LOCO Web Dashboard Overview
11:56 - The UFiber.Configurator application
12:55 - Download & Extract UFiber.Configurator (Must see)
13:37 - Clone the ISP ONT information to the UFiber LOCO (example)
18:57 - What is next (How to setup Internet connection after this?)
Thanks for watching and see you guys in the next video!

23:: NanoPi R6C - Overview, Quick Setup & 1Gbps Throughput Test
01.01.1970 · 01:00:00 ··· 30.04.2023 · 12:00:31 ··· ··· ··· ··· ··· ··· The NanoPi R6C is a new Single Board Computer & Router from FriendlyElec. It is powered by the 8-cores high-performance Rockchip RK3588S SoC with integrated GPU, NPU and VPU. It has a 2.5GbE LAN port (PCIe) and a Gigabit WAN port (native). The R6C can be used in different applications; this video will focus on the device specification and performance with OpenWrt when handling 1Gbps Internet plan.
Something new the R6C has is the PCIe M.2 connector (M Key). It supports an NVMe M.2 SSD or a M.2 wireless network card (I rarely see an M-Key wireless card in the market).
R6C Specs Quick Summary:
CPU: Rockchip RK3588S Quad-core ARM Cortex-A76 (2.4GHz) & Quad-core Cortex-A55 (1.8GHz)
RAM: 4GB / 8GB LPDDR4X RAM
eMMC: 0GB/ 32GB eMMC 5.1
GPU: Mali-G610
PCIe: M.2 M-Key, PCIe2.1 x1, support NVME, PCIe WiFi
WAN: Native Gigabit Ethernet x1, RTL8211F-CG
LAN: PCIe 2.5G Ethernet Ethernet x1, RTL8125BG
Product homepage: https://www.friendlyelec.com/index.php?route=product/product&product_id=291
Video timeframe:
00:00 - NanoPi R6C Quick Intro
00:35 - NanoPi R6C Specification
03:18 - NanoPi R6C Teardown & Internal Components Overview
05:35 - Internet Setup - Physical Connection
06:00 - Access R6C LuCI Web-UI
07:25 - Configure PPPoE (Internet)
11:30 - 1Gbps PPPoE Throughput Test with CPU Usage
11:58 - Enable Packet Steering & Test
12:52 - Enable Software Offloading & Test
14:13 - How to Configure PPPoE with VLAN?
15:12 - Pre-Installed Packages on the NanoPi R6C
Thanks for watching and see you all in the next video!

24:: Install OpenWRT on Aruba AP-175
01.01.1970 · 01:00:00 ··· 06.04.2023 · 11:30:00 ··· ··· ··· ··· ··· ··· In this video, I will show you how to install OpenWRT on the Aruba AP-175.
TL;DR
The PR to add OpenWRT support for the AP-175 was created by Hurricos on September 2022. Recently, it was merged into OpenWRT master on on March 26, 2023. Now, you can find the firmware on snapshots/targets/ath79/
Detail guide: https://vantc.net/install-openwrt-on-the-aruba-ap-175.html
The installation process consists of 2 main steps:
- Replace the stock u-boot with a custom u-boot that allows unsigned kernels to boot. After that, write the custom u-boot to the internal SPI Flash chip with a CH314A SPI-Flasher, or use a Raspberry Pi SBC and directly connect it to the SPI Flash Chip with a test clip.
- Once the custom u-boot had been flashed, use a USB-A-to-A cable to establish the Serial Connection. From this, use the normal u-boot serial flashing procedure to boot the OpenWRT sysupgrade image via tftp.
Video timeframe:
00:00 - OpenWRT on Aruba AP-175 Intro
01:10 - Installation Procedure Summary
02:19 - Preparation
02:39 - Access the SPI NOR chip with Raspberry Pi and Test Clip
04:10 - Create & Write custom u-Boot on AP-175
09:32 - Boot OpenWRT sysupgrade image via tftp
14:06 - Connect to AP-175 with SSH & Configure Static IP Address
18:59 - Install LuCI (and fix DNS & opkg feeds)
24:02 - Access AP-175 LuCI Web Interface
25:00 - Configure Wireless (2.4GHz and 5GHz WiFi)
29:19 - Final words
References:
- OpenWRT on AP-105 (doc): https://openwrt.org/toh/aruba/ap-105
- Add Aruba AP-175 support PR: https://github.com/openwrt/openwrt/pull/10794
- Custom u-Boot for AP-175: https://github.com/Hurricos/u-boot-ap105/tree/ap175
Good luck and see you again!

25:: I use the TP-Link XZ000-G3 with a different ISP
01.01.1970 · 01:00:00 ··· 19.03.2023 · 11:30:11 ··· ··· ··· ··· ··· ··· You can "unlock" the XZ000-G3 and use it to replace the ONT provided by other ISP. In this video, I have replaced the iGate GW040-H (provided by VNPT) with the XZ000-G3 (provided by FPT) and set up a working internet connection.
TL;DR
- I installed Gigabit fiber internet and the ISP is FPT. They provided the TP-Link XZ000-G3 which is working in bridge mode. https://youtu.be/ybdS7lD4jsI
- I flashed an "unlocked" firmware on the XZ000-G3 and gain access to hidden configuration such as GPON Serial Number, Software/Hardware version. https://youtu.be/hPedTKrreEA
- I wanted to use the XZ000-G3 with my other ISP, which is VNPT. Therefore, I cloned the information of the VNPT's ONT (iGate GW040-H) to the XZ000-G3 and the GPON connection is successfully authenticated (O5).
- I monitor and see that both the PON & PPPoE connection is up and running for 5 days with no problem at all. Therefore, I decided to make this video and share the progress with you.
Timelime:
00:00 - Intro
01:22 - Backup Original GPON configuration of the XZ000-G3
03:31 - The iGate GW040-H ONT (from a different ISP)
04:52 - Clone the GPON SN & GPON Password (Don't skip)
10:29 - Connect fiber cable from VPNT (a different ISP) to the XZ000-G3
11:24 - GPON O5 and VLAN scan
12:05 - PPPoE connection setup
14:17 - Stability of the XZ000-G3 with my new ISP
How to repack the "unlocked" XZ000-G3 firmware - https://github.com/mobrembski/tprepack
Thanks for watching and see you soon!

26:: TP-Link XZ000-G3 Unlocked Firmware (Reveal Hidden Configurations)
01.01.1970 · 01:00:00 ··· 08.03.2023 · 16:00:21 ··· ··· ··· ··· ··· ··· Recently, I flashed a modified firmware on the TP XZ000-G3 and gain access to the hidden configuration including changing the GPON Vendor ID, Serial Number, ONT version, Software Version and Equipment ID, etc.
I can also access to IoT configuration and GPON CTC configuration. From this, I can integrate this GPON ONT with other ISP and this is what I am going to do in the next video.
In order to get this "unlocked" modified firmware, you have to dump mtd0 of the device and use a script to unpack & repack it. At the momment, only Michał Obrembski is working on the final revision and he plan to share this guide next week.
Video timeframe:
00:00 - The current Web-UI with limited configuration
01:12 - Flash the modified firmware with the Web-UI
02:50 - The "unlocked" Web-UI
04:21 - The "unlocked" GPON Configuration
That is all for this video. See you in the next update!

27:: TP-Link XZ000-G3 GPON ONT - Teardown - UART Console Access
01.01.1970 · 01:00:00 ··· 05.03.2023 · 14:30:03 ··· ··· ··· ··· ··· ··· In this video, let's dig the XZ000-G3 GPON ONT by tearing it down, soldering the UART headers and let's see if we can find any interesting thing with this device.
UART login: admin/1234
Clear photos & more detail - https://vantc.net/all-about-the-tp-link-xz000-g3-gpon-ont.html
00:00 - Introduction
00:42 - Teardown the XZ000-G3
04:19 - Closer look at the PCB components (EN751221 SoC)
06:29 - Solder the UART headers
06:40 - Connect the USB TTL Adapter to the UART headers
07:26 - Establish the UART Serial connection with Putty (admin/1234)
11:11 - Attempt to access hidden features (change SW, HW info, OCMI, etc.)
14:08 - Backup the firmware (Dump the mtd0)
Here is an overview of the specs that I got from the console:
System type: EcoNet EN751221 SOC
CPU Model: MIPS 34Kc V5.8
RAM: 64 MB
That is all for this video. Thanks for watching and see you in the next video!

28:: TP-Link XZ000-G3 GPON Terminal - Hardware & Web-UI Overview
01.01.1970 · 01:00:00 ··· 28.02.2023 · 16:00:16 ··· ··· ··· ··· ··· ··· XZ000-G3 is a 1-Port Gigabit GPON Terminal from TP-Link. The product has been around since 2022 and becomes popular in 2023 since some ISPs are using it in bridge mode and allow customers to use their own router to for the internet connection.
In this video, let's take a look at the XZ000-G3 ONT connectors and the Web Interface features.
Interface: 1 x Gigabit Ethernet port (RJ45), 1 x SC/APC Port (Fiber)
Data Rate: Upstream: 1.244Gbps, Downstream: 2.488Gbps
VLAN Mode: 802.1Q tag VLAN, VLAN transparent mode/VLAN translation mode/VLAN trunk mode, Authentication based on SN and Password, VLAN Auto Detect
Security: AES Encryption, Packet Filter based on VLAN
More detail can be found at https://service-provider.tp-link.com/gpon/xz000-g3
Video timeframe:
00:00 - TP-Link XZ000-G3 Hardware Overview
01:58 - Connect Fiber cable & Power on
03:49 - Access the XZ000-G3 Web UI & Feature Overview
06:25 - GPON Configuration (GPON Password & GPON Serial Number)
06:55 - VLAN Mode Configuration
10:18 - Should I tear it down?
That will be all for this video. Thanks for watching and see you soon!

29:: 2.5G GPON with the Nokia G-010S-A ONT and NanoPi R6S
01.01.1970 · 01:00:00 ··· 26.02.2023 · 11:15:00 ··· ··· ··· ··· ··· ··· In the previous videos, I have introduced the Nokia GPON ONT G-010S-A SFP module and the new Gigabit Fiber Internet that I have just installed. I wonder if the ISP and the G-010S-A support 2.5G GPON; therefore, I replaced the ISP provided ONT (TP-Link XZ000-G3) with the Nokia G-010S-A and the JUPLINK 2.5G Media Converter, and set up the internet connection with the NanoPi R6S.
TL,DR: The Nokia G-010S-A supports 2.5G GPON
Video timeframe:
00:00 - Device Introductions (Nokia G-010S-A, TP-Link XZ000-G3)
01:35 - Device Installation & Boot up
03:27 - Nokia G-010S-A GPON Configuration
06:35 - Speedtest (beyond Gigabit)
08:07 - Nokia G-010S-A CPU Usage with 2.5G GPON
References:
- The NanoPi R6S Official Store: https://www.friendlyelec.com/index.php?route=product/product&product_id=289
- You can also get the NanoPi R6S from Amazon US at $169.99: https://amzn.to/3GWkjue (Affiliate)
- If you enjoy the videos, you can support me paying the month Internet fee at https://www.patreon.com/vantechcorner
- Nokia G-010S-A: https://youtu.be/3g6mRDfUppQ
- Hisense LTE3415: https://youtu.be/yD8aq4KSWko
Thanks for watching and see you in the next video!

30:: I have installed Gigabit Fiber Internet ft. TP-Link XZ000-G3 & NanoPi R6S
01.01.1970 · 01:00:00 ··· 20.02.2023 · 11:15:03 ··· ··· ··· ··· ··· ··· Last week, I have installed a new fiber cable to my home and it is Gigabit Internet.
In this video, I will show you the ISP provided devices and we are going to have some throughput test with the NanoPi R6S.
At first, the technician provided the ZTE F671Y GPON router. After I request to configure the router to work in bridge mode, he gave me a pure ONT from TP-Link, which is the XZ000-G3. I will make a follow up video regarding this device.
Video timeframe:
00:00 - Intro
00:59 - The fiber termination box
01:10 - The ISP provided equipments
01:24 - The TP-Link XZ000-G3
02:17 - The PPPoE Setup on OpenWRT LuCI
05:04 - Speedtest & R6S CPU Usage
- The NanoPi R6S Official Store - https://www.friendlyelec.com/index.php?route=product/product&product_id=289
- You can also get the NanoPi R6S from Amazon US at $169.99 - https://amzn.to/3GWkjue (Affiliate)
- If you enjoy the videos, you can support me paying the month Internet fee at https://www.patreon.com/vantechcorner
Thanks for watching and see you in the next one!

31:: GL-iNet Beryl AX WiFi6 AX3000 Travel Router Overview & Speedtest (GL-MT3000)
01.01.1970 · 01:00:00 ··· 06.02.2023 · 11:30:01 ··· ··· ··· ··· ··· ···
32:: OpenWRT - Emulex OneConnect OCe14102 Dual SFP+ Adapter ft. QSFPTEK 10GBASE-SR SFP+ Transceiver
01.01.1970 · 01:00:00 ··· 24.01.2023 · 06:15:01 ··· ··· ··· ··· ··· ···
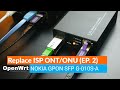
33:: Replace ISP ONT/ONU - NOKIA GPON SFP G-010S-A (OpenWrt SFP 7.5.3)
01.01.1970 · 01:00:00 ··· 18.01.2023 · 11:30:01 ··· ··· ··· ··· ··· ···
34:: Inexpensive JUPLINK 2.5G Media Converter (SFP to 2.5GbE RJ45) - Unboxing & Overview
01.01.1970 · 01:00:00 ··· 12.01.2023 · 11:00:06 ··· ··· ··· ··· ··· ···
35:: OpenWRT - Realtek RTL8125B 2.5GbE Network Adapter Overview & Testing
01.01.1970 · 01:00:00 ··· 08.01.2023 · 11:30:14 ··· ··· ··· ··· ··· ···

36:: Channel update & New devices (Aruba AP-175, WS-AP3825i and AsiaRF AW7916-NPD)
01.01.1970 · 01:00:00 ··· 31.12.2022 · 10:30:19 ··· ··· ··· ··· ··· ···
37:: NanoPi R6S SQM QoS Throughput (Torrent/iperf3/OpenSpeedTest)
01.01.1970 · 01:00:00 ··· 25.12.2022 · 15:45:00 ··· ··· ··· ··· ··· ···

38:: OpenWRT - EdgeRouter X Throughput & Power Consumption (with Hardware Offloading)
01.01.1970 · 01:00:00 ··· 14.12.2022 · 11:30:14 ··· ··· ··· ··· ··· ···
39:: NanoPi R6S - Wireguard & OpenVPN Throughput Test
01.01.1970 · 01:00:00 ··· 08.12.2022 · 11:30:06 ··· ··· ··· ··· ··· ···

40:: ORICO UFSD Flash Drive - Overview & Benchmark (USB A, 128GB)
01.01.1970 · 01:00:00 ··· 04.12.2022 · 11:30:02 ··· ··· ··· ··· ··· ···
41:: NanoPi R6S - 2.35Gbps Throughput with only 5W of Power Consumption
01.01.1970 · 01:00:00 ··· 27.11.2022 · 12:00:26 ··· ··· ··· ··· ··· ···
42:: NanoPi R6S Bootup - Firmware Update (eMMC) - PPPoE Speedtest
01.01.1970 · 01:00:00 ··· 22.11.2022 · 11:30:15 ··· ··· ··· ··· ··· ···

43:: NanoPi R6S - Unboxing and Quick Overview
01.01.1970 · 01:00:00 ··· 17.11.2022 · 11:30:00 ··· ··· ··· ··· ··· ···
44:: Replace ISP ONT/ONU with PON Stick (SFP Module) - Hisense GPON LTE3415 and OpenWRT
01.01.1970 · 01:00:00 ··· 13.11.2022 · 11:30:29 ··· ··· ··· ··· ··· ···

45:: OpenWRT - Mellanox ConnectX-3 10GbE SFP+ Network Adapter ft. Zimaboard
01.01.1970 · 01:00:00 ··· 30.10.2022 · 11:30:13 ··· ··· ··· ··· ··· ···
46:: OpenWRT - Intel N5105 2.5GbE I225-V - Build Custom Firmware & Throughput Test
01.01.1970 · 01:00:00 ··· 05.09.2022 · 00:00:00 ··· ··· ··· ··· ··· ···